How-to guide
Choosing trowel size and checking coverage
Why notch size matters for large-format tile and how to verify transfer to the back of the tile.
Field notes from FIXONEX — use with your product TDS and site-specific specification. When in doubt, talk to our team before you lock the detail.
Notch depth and tile geometry
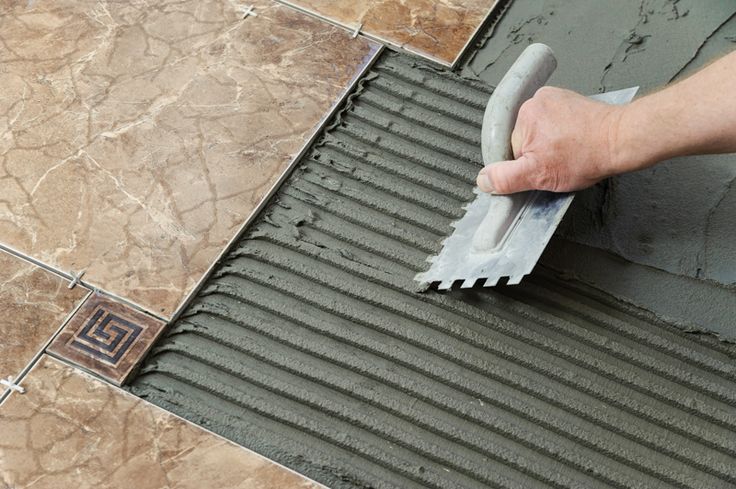
The trowel leaves ridges that collapse when you beat the tile in. Larger, heavier, or more cupped tiles need deeper notches and often a different spread pattern — sometimes back-buttering is part of the system, not an optional extra.
If the product page or specifier calls for a minimum bed thickness, the trowel choice has to deliver that after compression, not before.
Direction and air relief
Comb ridges in straight passes so air has a path out. Random swirling looks fine until you lift a test tile and see voids at the corners.
For big panels, work to the manufacturer’s direction on short vs long side first — the goal is full support without trapped air.
Lift-and-check on real tile
Periodically lift a freshly bedded tile before the material skins. You want coherent transfer across the back — cold spots mean more beat-in, more adhesive, or a change in notch geometry.
Log the combination that worked (substrate, trowel, beating method) when the room conditions repeat — crews move faster with a recipe than with guesswork.
Takeaways
- The right notch is the one that fills the back after beat-in.
- Lift-and-check beats arguing after the grout goes in.
- Large format rewards systematic spreading, not speed alone.
Product ranges
All products referenced in this guide
Explore specifications, pack sizes, and downloads for each range — then loop back here if you need installation context.